Firewall vs NGFW
In this post, I will describe the process of understanding firewalls and share my journey in selecting suitable software and appliances.

Definition from Wikipedia.org:
Next-generation firewall (NGFW) is a part of the third generation of firewall technology, combining a traditional firewall with other network device filtering functions, such as an application firewall using in-line deep packet inspection (DPI), an intrusion prevention system (IPS). Other techniques might also be employed, such as TLS/SSL encrypted traffic inspection, website filtering, QoS/bandwidth management, antivirus inspection, third-party identity management integration (i.e. LDAP, RADIUS, Active Directory).[1], and SSL decryption.
Indeed, one of the key differentiators of Next-Generation Firewalls (NGFWs) is their extended operational range across the OSI model layers compared to traditional firewalls. NGFWs can operate at layers 2 through 7, allowing them to not only inspect and control traffic based on IP addresses and port numbers (layers 3 and 4) but also to delve deeper into the content of the packets (layers 5 to 7). This capability empowers NGFWs to offer more sophisticated security measures, such as application identification and control, user-based policies, and content filtering, resulting in enhanced protection against a broader range of threats and vulnerabilities. In contrast, traditional firewalls, operating primarily at layers 2 to 4, provide more basic traffic filtering and routing functions, which might limit their ability to address the complexities of modern network security challenges.
Software&Hardware selection
Nowadays, we can choose between many firewalls. Great comparison was made on Lawrence Systems YouTube channel. Check the spreadsheet with comparison of firewalls:
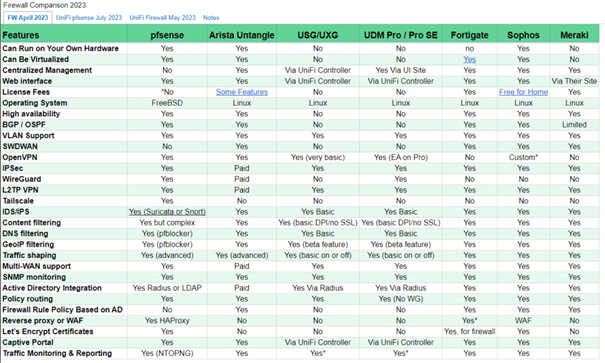
In my scenario, I want to run a firewall on my own hardware and avoid paying license fees. This leaves me with a choice between pfSense and Sophos. pfSense is an excellent option for companies that cannot allocate funds for license fees. In my case, for a lab scenario, I can make use of the Sophos Firewall Home edition. The Home edition license grants me the ability to utilize 4 CPU cores and 6GB of RAM solely for personal/lab environments and non-commercial purposes. By agreeing to the license terms, I can deploy a Next-Gen Firewall in my network at no cost, provided I have suitable hardware to run the software.
If you’re looking to deploy a firewall without paying license fees, I would recommend going for pfSense. However, I highly recommend allocating funds for an enterprise-grade appliance. Out-of-the-box, pfSense is not a Next-Gen firewall. It requires additional plugins, as mentioned in the above spreadsheet. Additionally, it lacks artificial intelligence capabilities for threat detection.
So after choosing the correct vendor it is time to buy hardware for running firewall. It is worth to mention that Intel NICs are required. Hardware requirements for Sophos Home:
- Intel Compatible Computer with Dual NIC
- Quad-Core
- 6GB of Ram
- 120 GB of Disk
- Minimum of two (2) NICs for LAN & WAN and not intel i210 /i225 series NICs
- Bios Set to Legacy bios (CSM)
There are 2 ways of getting such a hardware.
- Buy Firewall Appliance with compatible Intel NIC
- DYI Firewall: Mini PC with PCI port + compatible Intel NIC
Due to increased popularity of pfSense, now there is a lot ready appliances which price ranges from $150 to $300. In my case, I have bought HP 620 Plus with Intel NIC for $100.
Sophos Firewall deployment and initial configuration
Finally, It is a time to deploy firewall:
- Request and download image from Sophos official site.
- Flash USB memory stick with this iso by Rufus in DD image mode
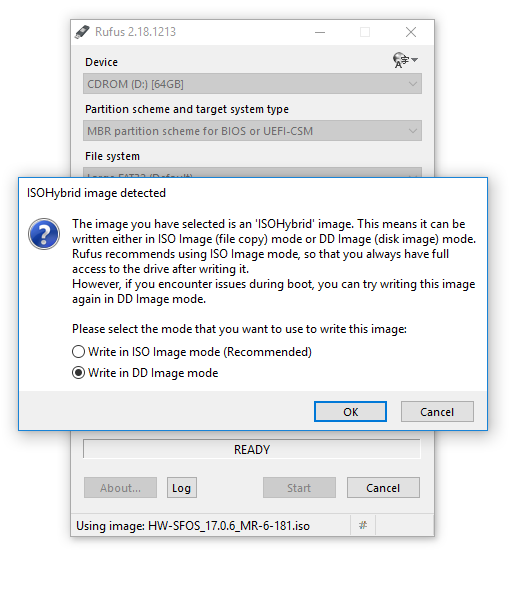
- In Firewall appliance – change boot mode in BIOS menu o to BIOS/Legacy.
- Boot from USB and proceed with installation.
Once the system is booted, the LAN interface IP must be configured in order to access the HTTP interface for the further setup process. Password for the default user is: “admin”
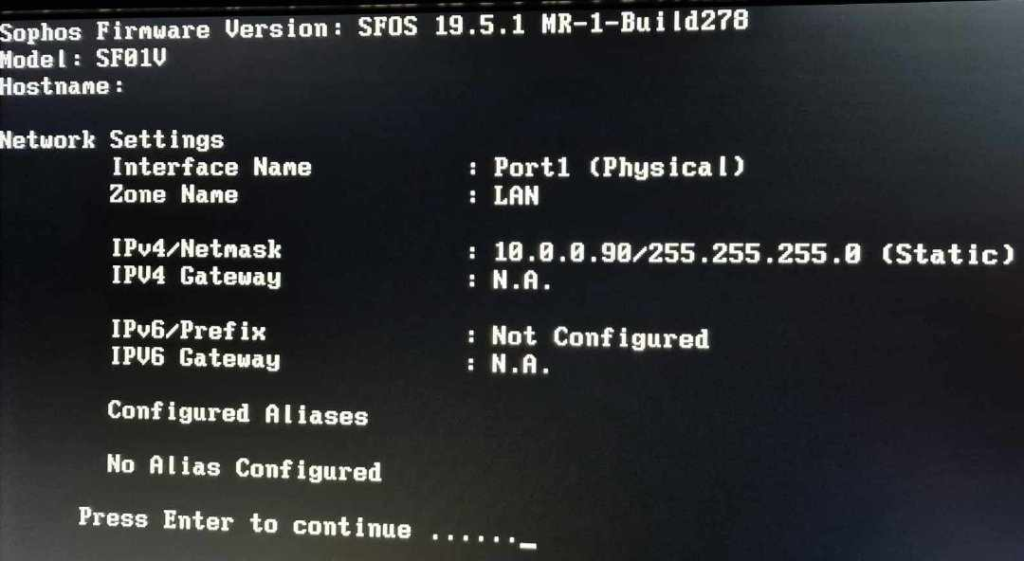
https://{LAN_IP}:4444

Upon agreeing to the end-user terms of use, it’s recommended to set up the WAN/Internet port to gain access to the internet. For Sophos, license activation is mandatory, and it’s advisable to perform this step during the initial installation.
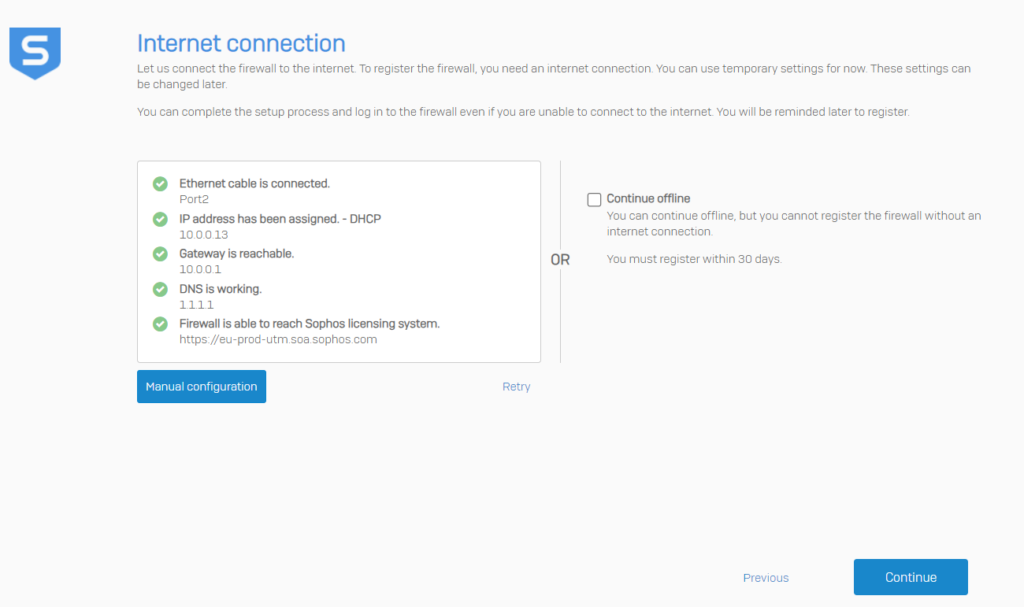
I have selected fw01.localhost for the internal FQDN. In my case I will go for fw01.internal, which follows appendix G in RFC 6762.

It is required to provide license key. I will utilize the key I received via email when prompted for the ISO image. In the later steps you will need to create Sophos ID.
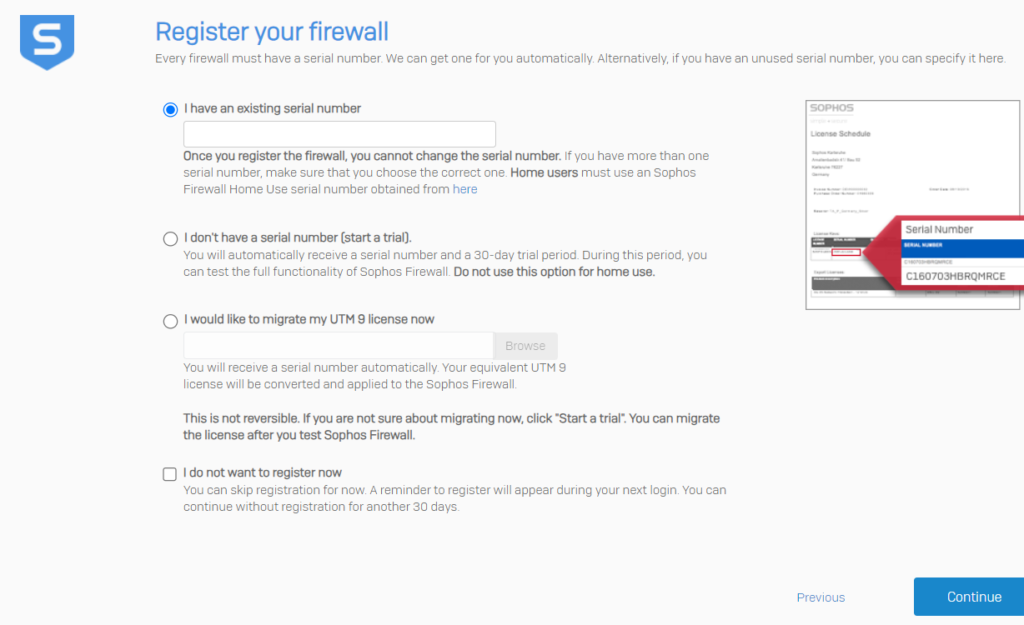
After successfully adding the license, the device will be rebooted. I had to re-enter initial information regarding device name and time zone.
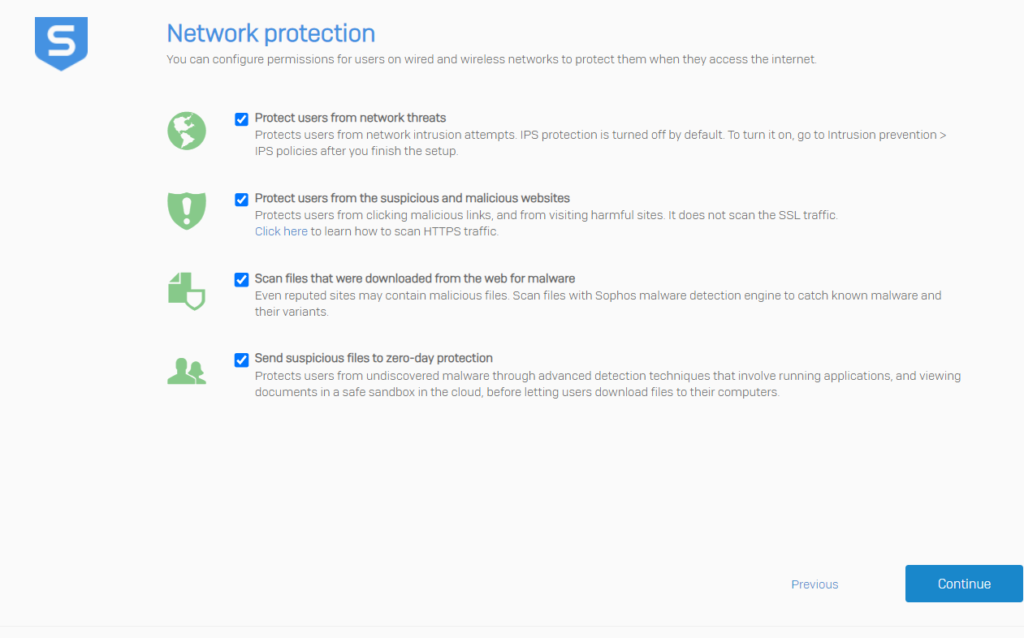
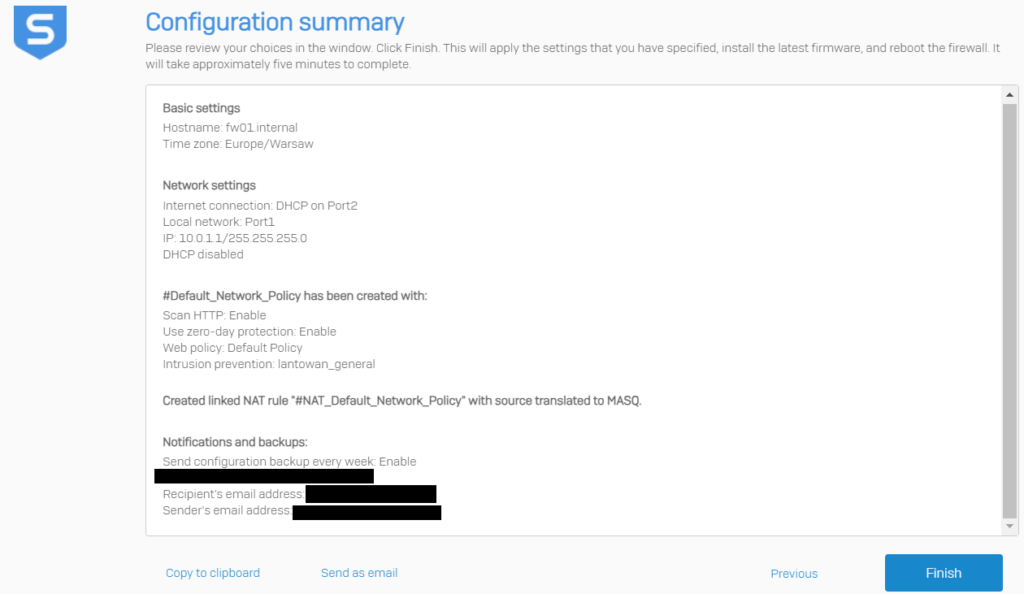
Because I switched network segment I need adopt my local interface IP addressing in order to reach management interface. I have only 1 NIC in my management device, so I have added 2nd IP address to the same interface, depends on your OS system it is pretty simple process:

Now I can test connection from WAN (10.0.0.0/24) and LAN (10.0.1.0/24) network segment. Below you can see control center of Sophos Firewall:

After initial install it is a good idea to harden the firewall appliance. Now the configuration comes quite plug-and-play, but I recommend to go through basic settings. You need to adjust some configuration to your environment, although most of the settings are applicable to everyone.
- Make sure that you are running latest firmware: Backup & Firmware > Firmware
- Remove and adjust local service ACL (Access Control List) (Administration -> Device access). Where possible, remove ALL services from the WAN and other custom ‘External’ zones.

- Turn and tune intrusion prevention system. You can enable it in GUI, but there are also configuration settings available by CLI
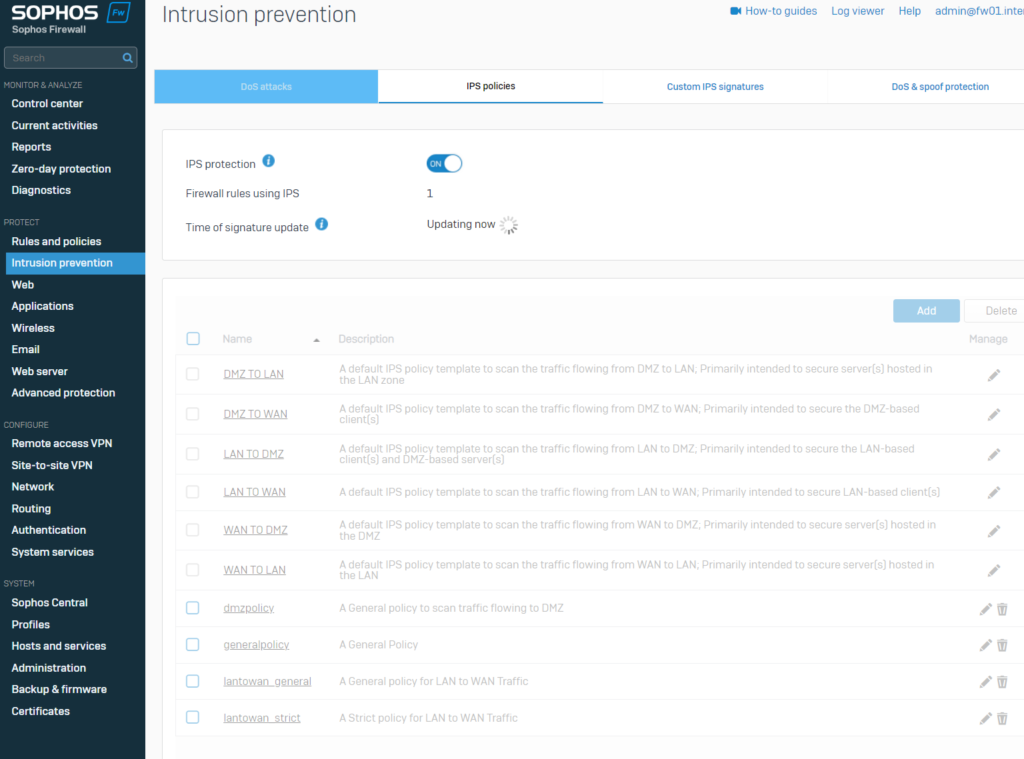
Overview of CLI settings:

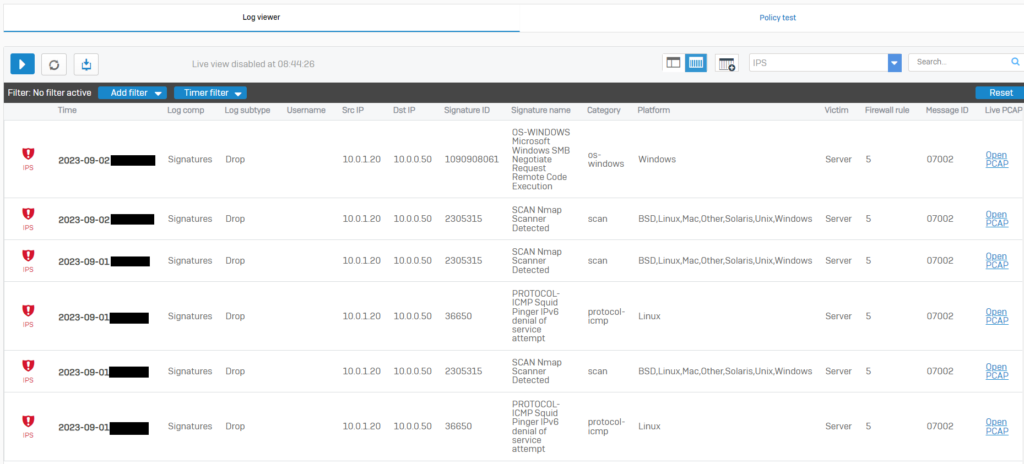
The IPS policy has already been integrated into the General_Network_Policy through firewall rules. To ensure that the IPS is functioning correctly in preventing scanner traffic, I have executed nmap scan and eternalblue exploit. You can check alerts in log viewer.
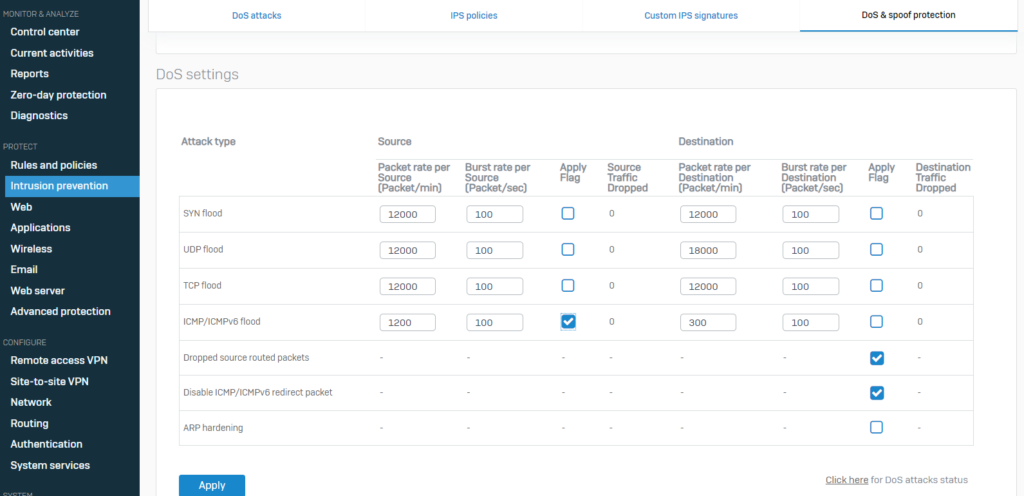
I decided to apply flag regarding DoS protection for ICMP flood attacks in IPS settings.
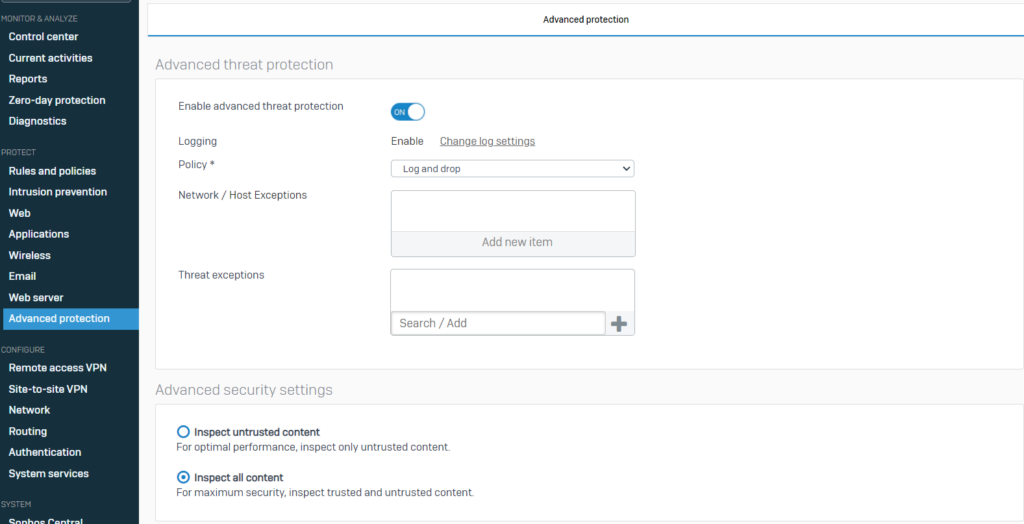
- Enable advance threat protection
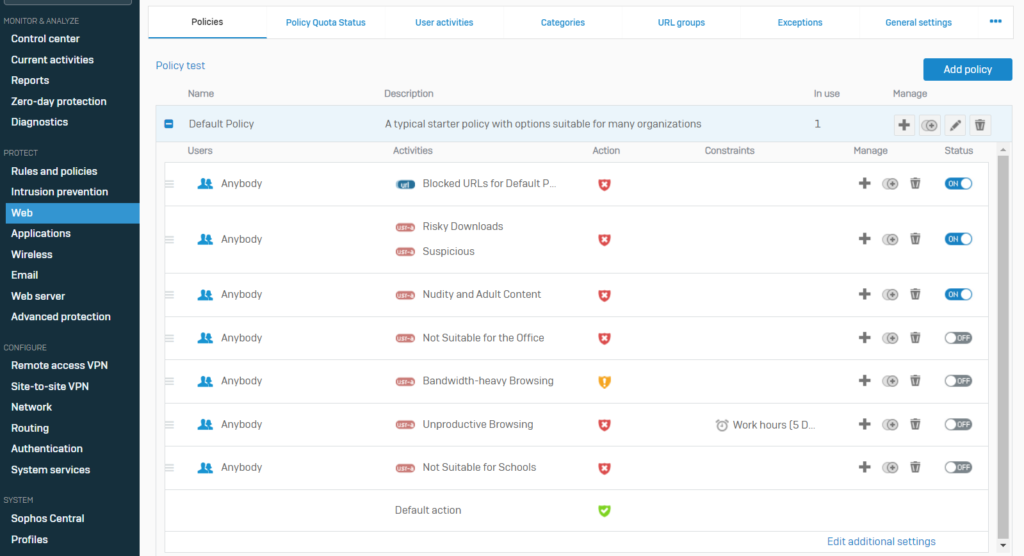
- Enable web policies to block all unwanted traffic.
6. Configure Two-factor authentication
Two-factor authentication can be configured in authentication tab:
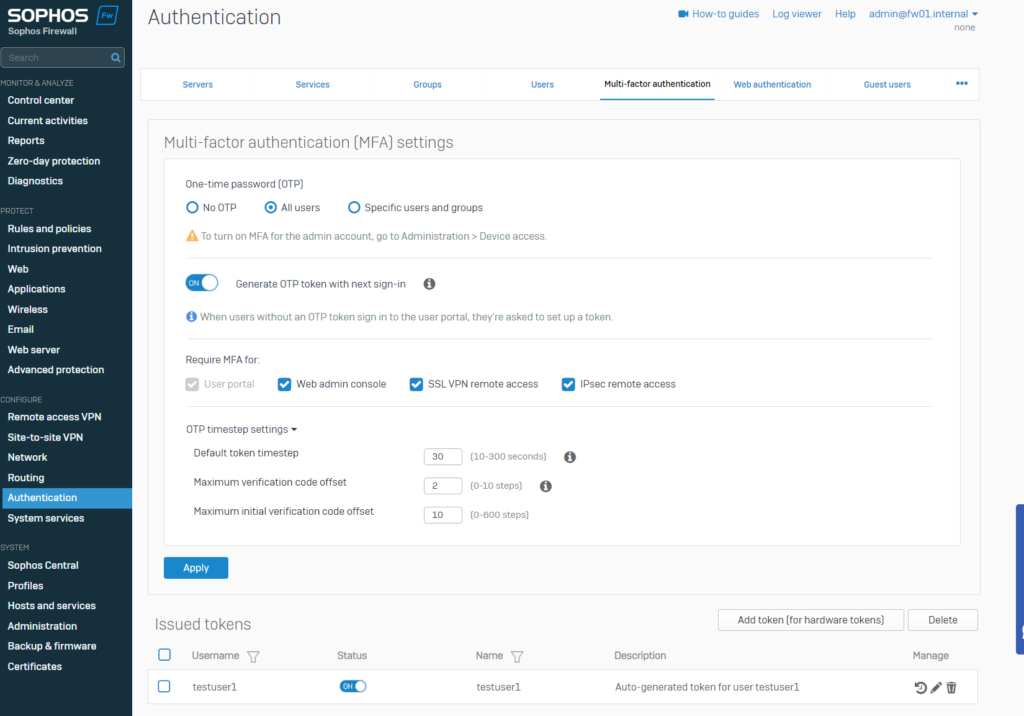
To enhance security, administrators should implement two-factor authentication (2FA) on trusted devices and firewall zones. 2FA adds an extra layer of protection by requiring users to provide both their password and a one-time passcode (OTP) generated by Sophos (or other e.g. Microsoft) Authenticator on their mobile device or tablet. Alternatively, hardware tokens can be used. To set up 2FA, enable the OTP service in the firewall settings and specify the features that require two-factor authentication. During their next login, all users will be required to configure OTP for added security.
Summary
I hope you will find this post is like your friendly guide to firewalls. It explains Next-Generation Firewalls, which are super-smart at keeping your stuff safe. You’ll understand how to pick the right one, whether you’re a senior security specialist or just starting out. And don’t miss the two-factor authentication – it’s for everyone, big or small.
Upcoming posts:
- Using Azure AD for free to handle identity management within the organization.
- SSL Inspection – The Real Benefit of Next-Generation Firewalls.
